Project Overview
The Cisco customer support portal was in need of a major upgrade, it was difficult for users to get the help they required and generated a lot of extra work for the customer service reps who handled the support cases. It was my job to redesign the portal and improve the experience. I was very fortunate that my product owner at Cisco had been working on the portal for the better part of a decade and had all the research and data I needed to get the project started.
The previous site required a user to sift through nearly 100 case type options, select one and then send it off to customer service. Customer service would then create a case and move it through the process. Unfortunately, the user never really knew where their stood in the resolution process and would have to wait until a case was resolved in order to see what was happening.
Working with the product owner we created a search based system. When a user would come to the portal they could search for the type of help they needed, launch a modal and fill out the necessary information and then pass their newly created case onto the customer service team. This would reduce the work load of the customer service while simultaneously giving the user more control over their cases. We also made it a point to create a table that showed all the existing cases and their status.
Lastly, we give the user the ability to manage their own cases. This would allow a user to escalate a case, add additional details or in version 2 even close a case on their own.
Process
When I started the project I worked with the product owner to understand the portal’s history and what the long term goals were. We then worked together to start coming up with solutions. While I normally like to have developers involved in this part of the project, I did not have access to them for collaboration.
I used pencil sketches to demonstrate worklows. The entire team was spread around the world (London, Amsterdam, India, Chicago, Texas and California) therefore I had to take photos with my phone and convert them into a pdf. I did a couple of rounds of revisions to address development concerns.
After the sketches were approved I moved onto wireframes. My wireframes were initially based on the technical support page, it had a very different layout than what the final project looked like. After I finished the wireframes, I learned Cisco had a new “UI kit” or style guide I needed to follow. I used the same user flows I created in the wireframes and pencil sketches while updating the look and feel to create the final visuals, these were based on the Cisco style guide.
I took the visuals and put them into InVision to create a basic prototype. This assisted the development and product teams when it came to the their overall understanding of the direction we wanted to take the project.
The development team I was working with was working in a new platform called Pega, for most of them this was their first exposure to the system. That unfortunately created some issues along the way. There were multiple unforeseen technical difficulties therefore I had to consistently adapt the user flows to address the limitations of the system.
The final agreement saw the cases created from both a search based system as well as a case type navigation. Also, all the cases were created within modals.
Lastly, the designs were a total departure from what users had previously seen, therefore at the start of the prototype we included a step by step tutorial. The tutorial in the prototype was my first pass at it. The final copy was still being written at the time I had phased off the project.
Project Elements
Prototype – The prototype does not cover every single case creation process, the goal was to create a series of user flow templates that could be repurposed as new case types were added. The first page of the prototype acts like a table of contents that allows the user to see specific user flows. Also, if you are new to InVision and are unsure where to click, click inside the white space of the page and the page links will momentarily flash so you can see where to click.
Style Guide – The developers requested an element by element style guide for development purposes.
Results
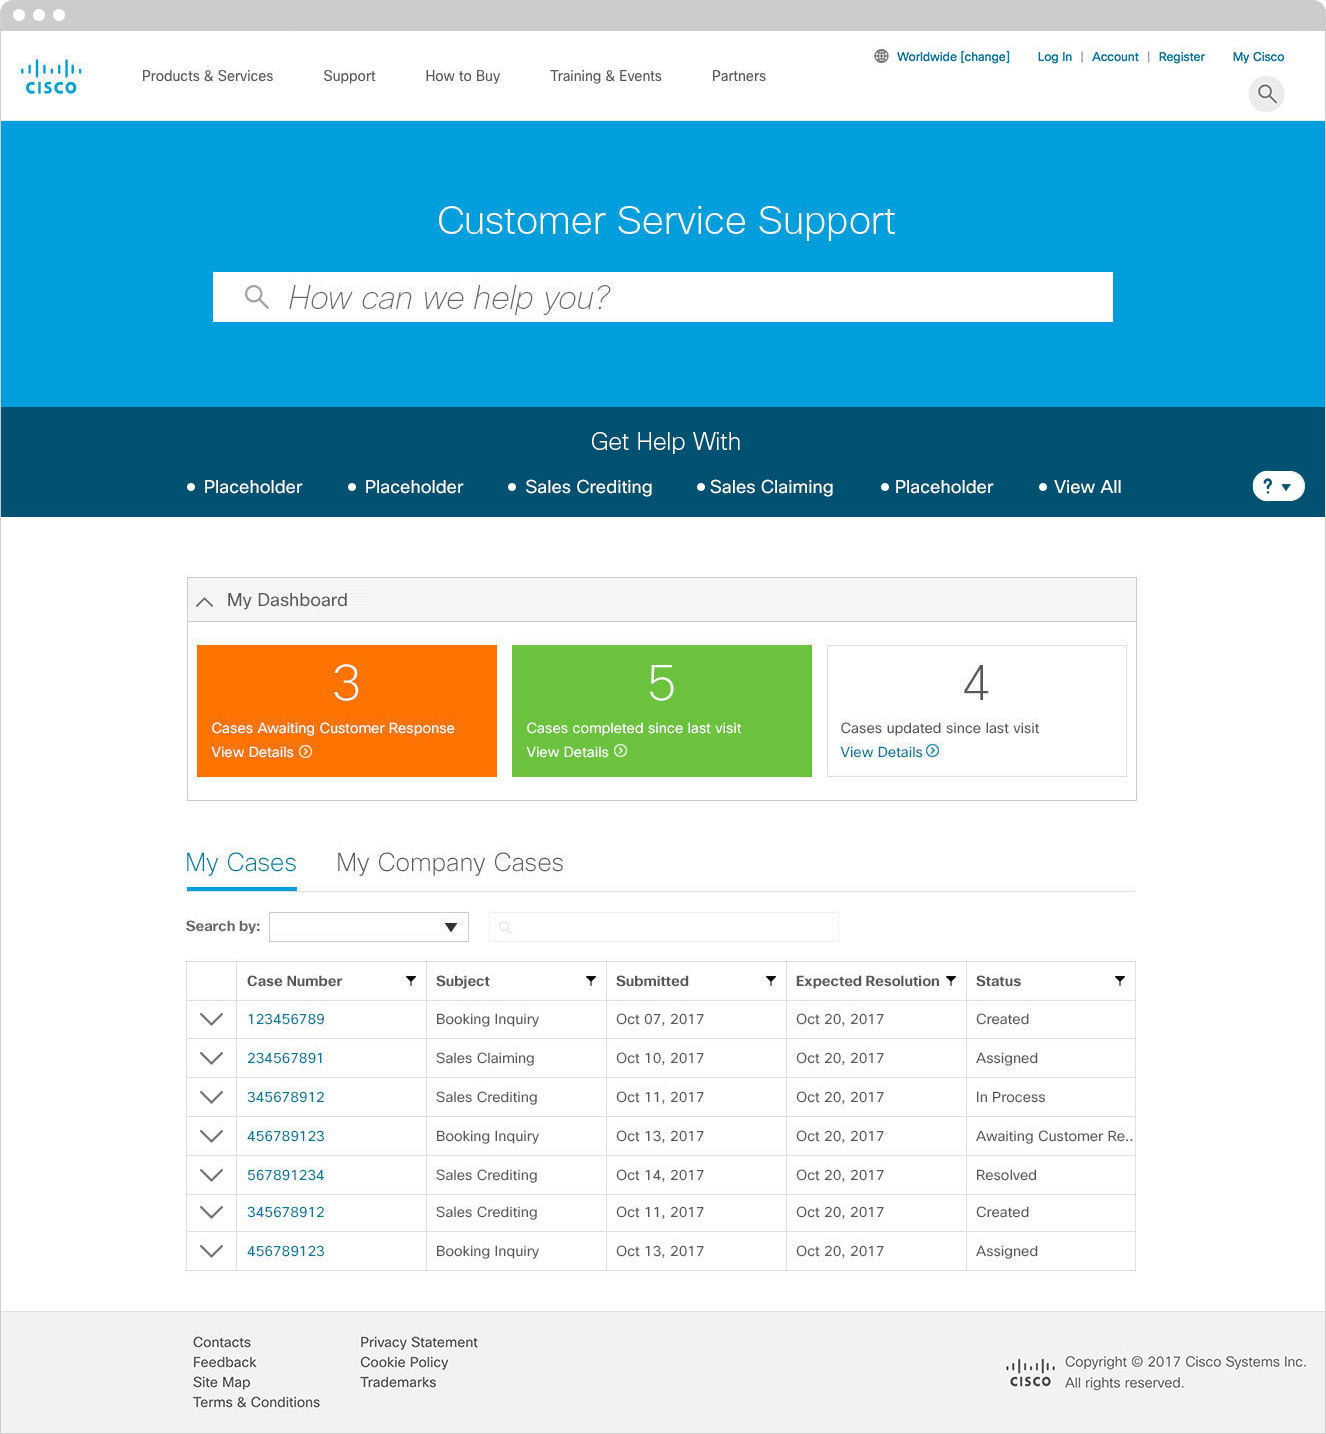
Basic Table Page
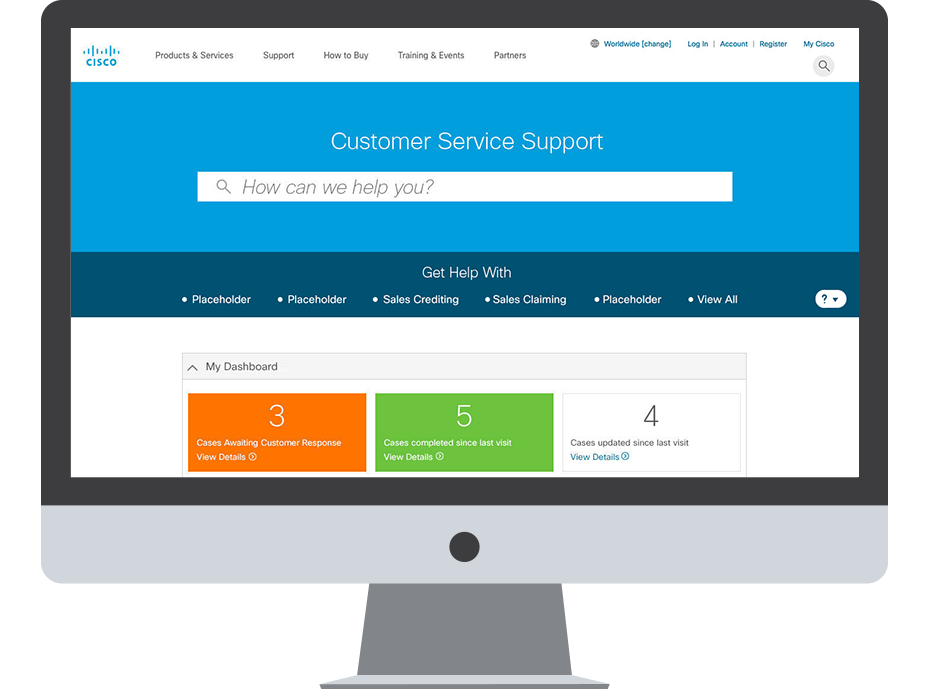
This is the base page for the Customer Service Support portal. The page assumes the user is logged in and has existing cases.
The search bar is where a user can search for the case type they need help with. "My Dashboard" functions as a filter to display cases by status. Lastly, the table displays active cases.
The search bar is where a user can search for the case type they need help with. "My Dashboard" functions as a filter to display cases by status. Lastly, the table displays active cases.
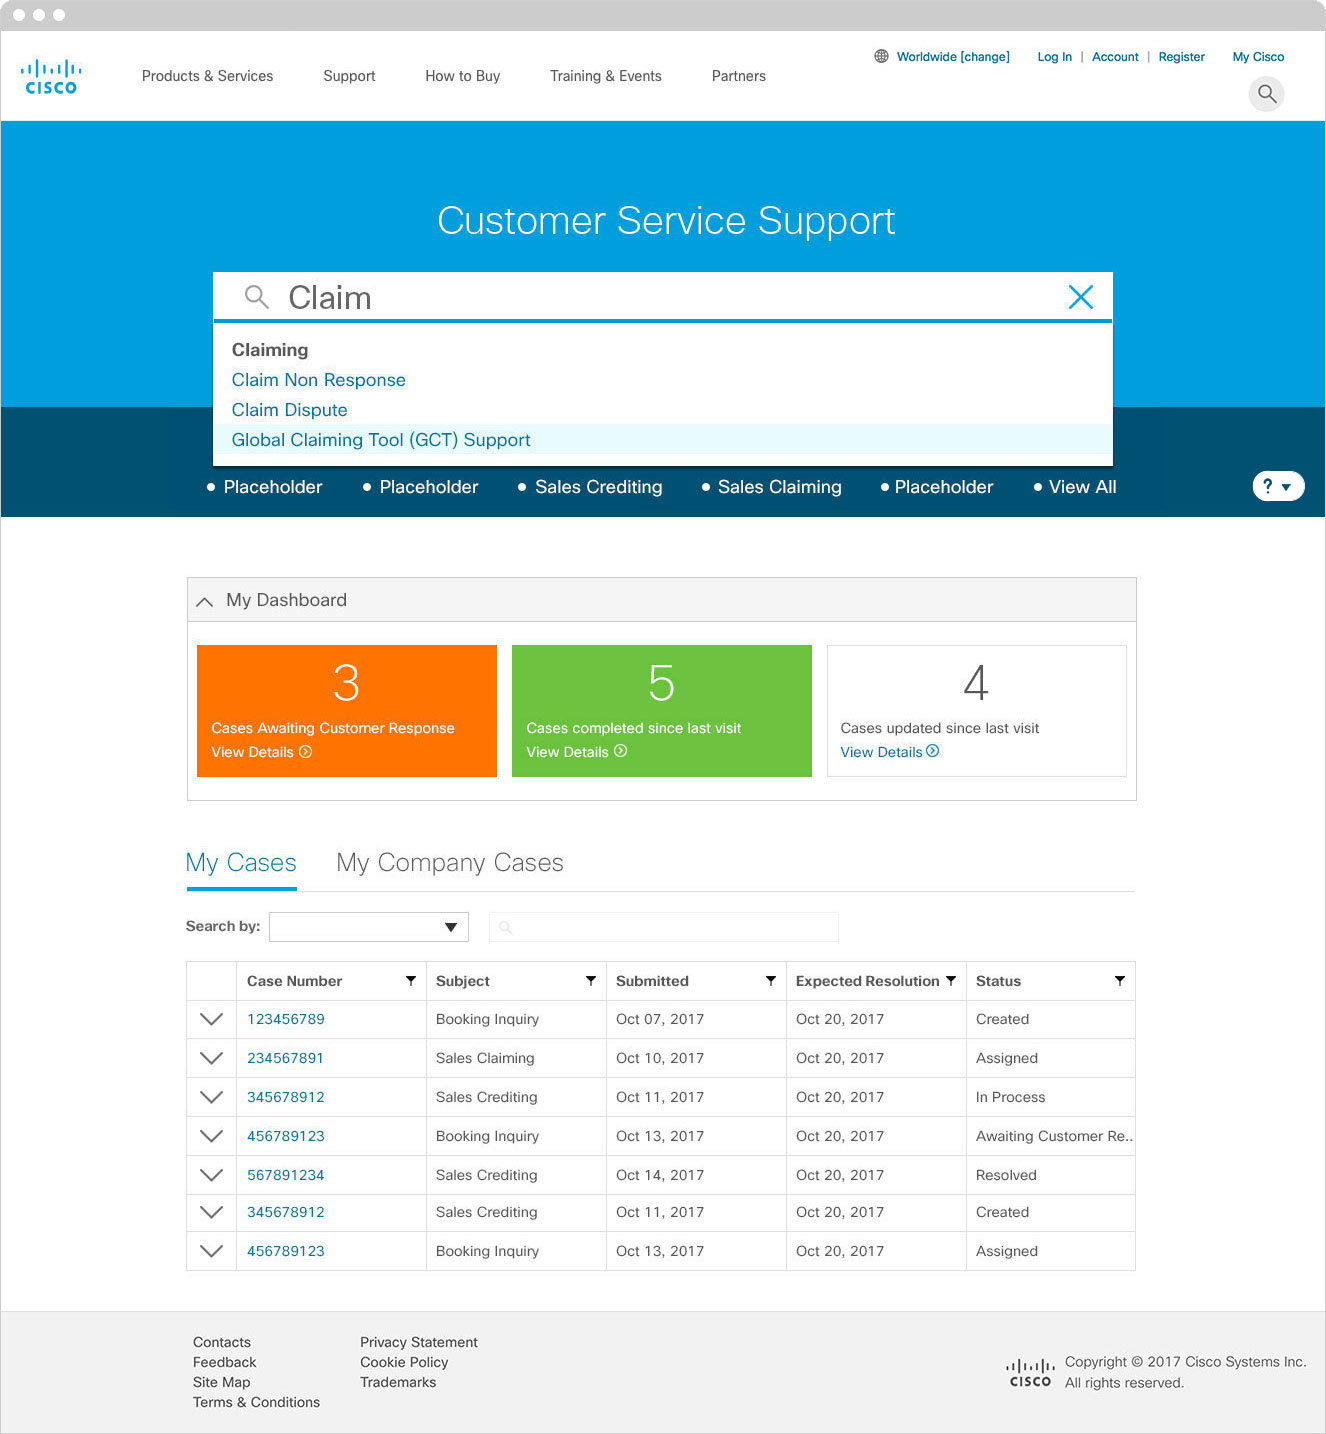
Search for a Case Type
When a user searches for support assistance they will see a predictive set of results based upon their search. User then clicks the result that best represents their needs and it begins the case creation process.
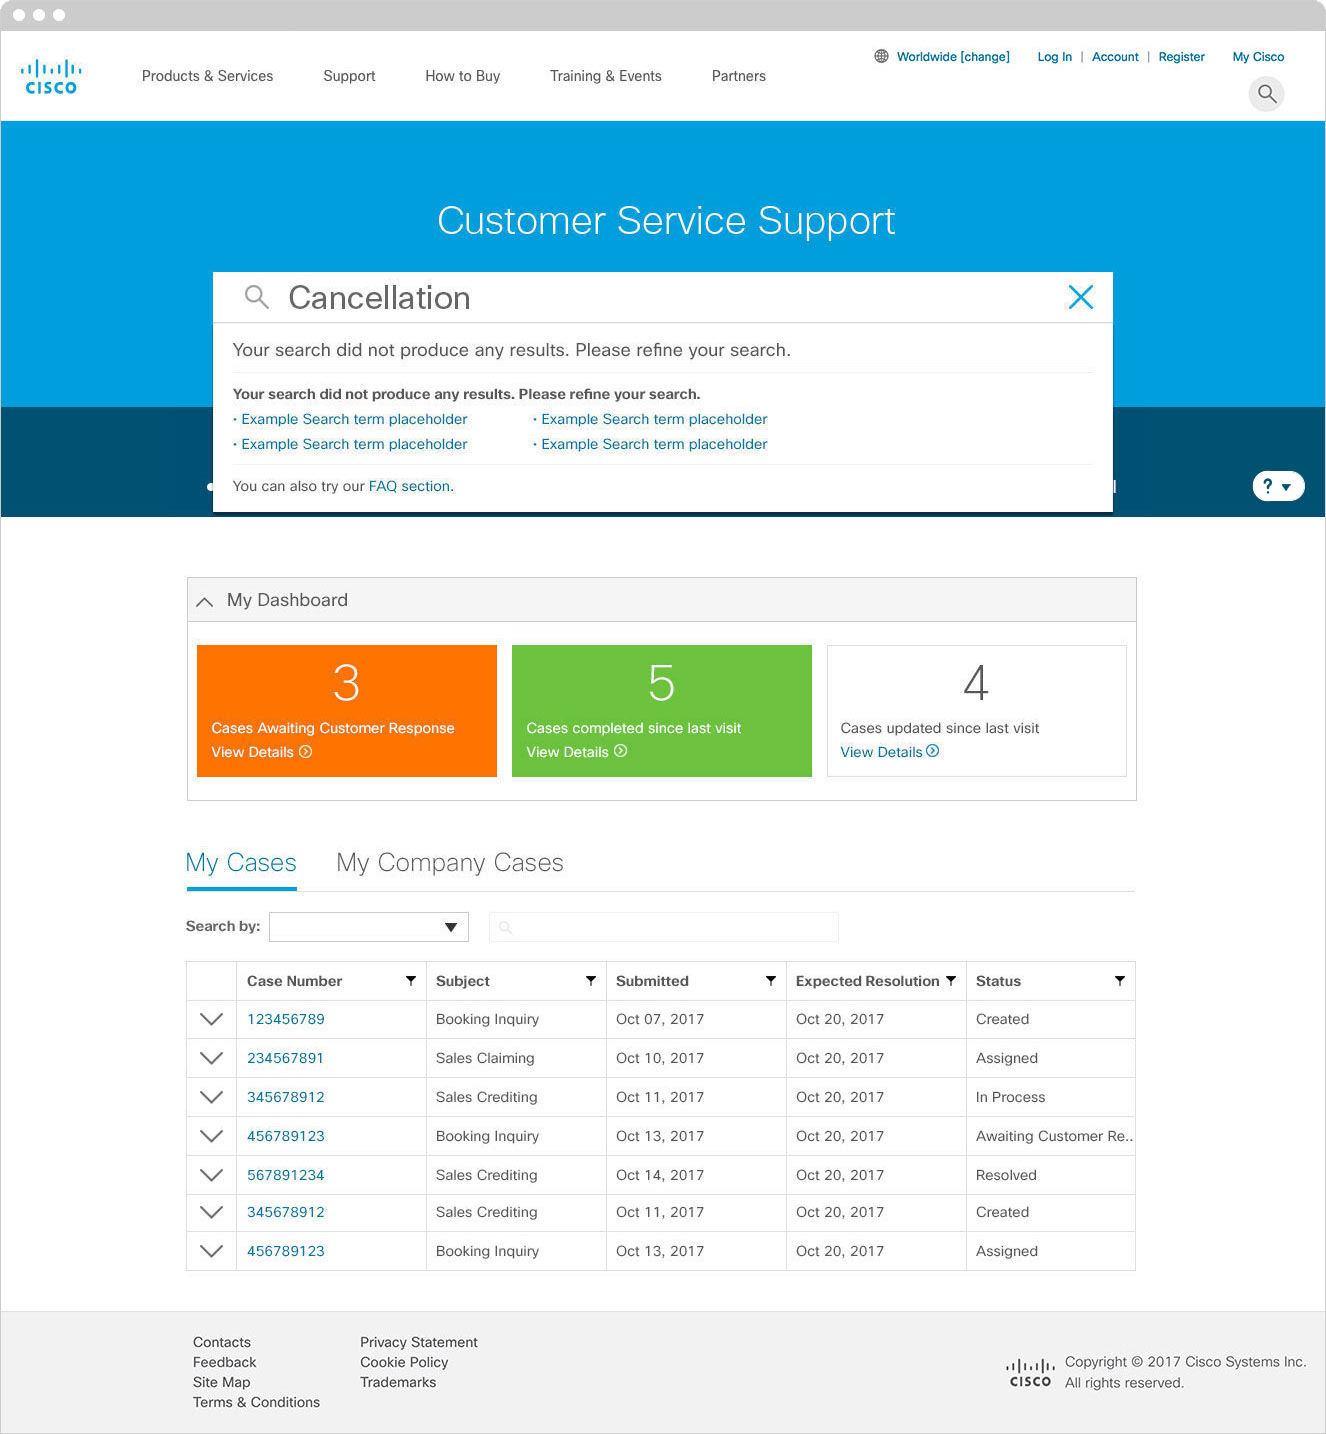
No Results
If a search doesn't generate any results the user will be presented with multiple options as shown below.
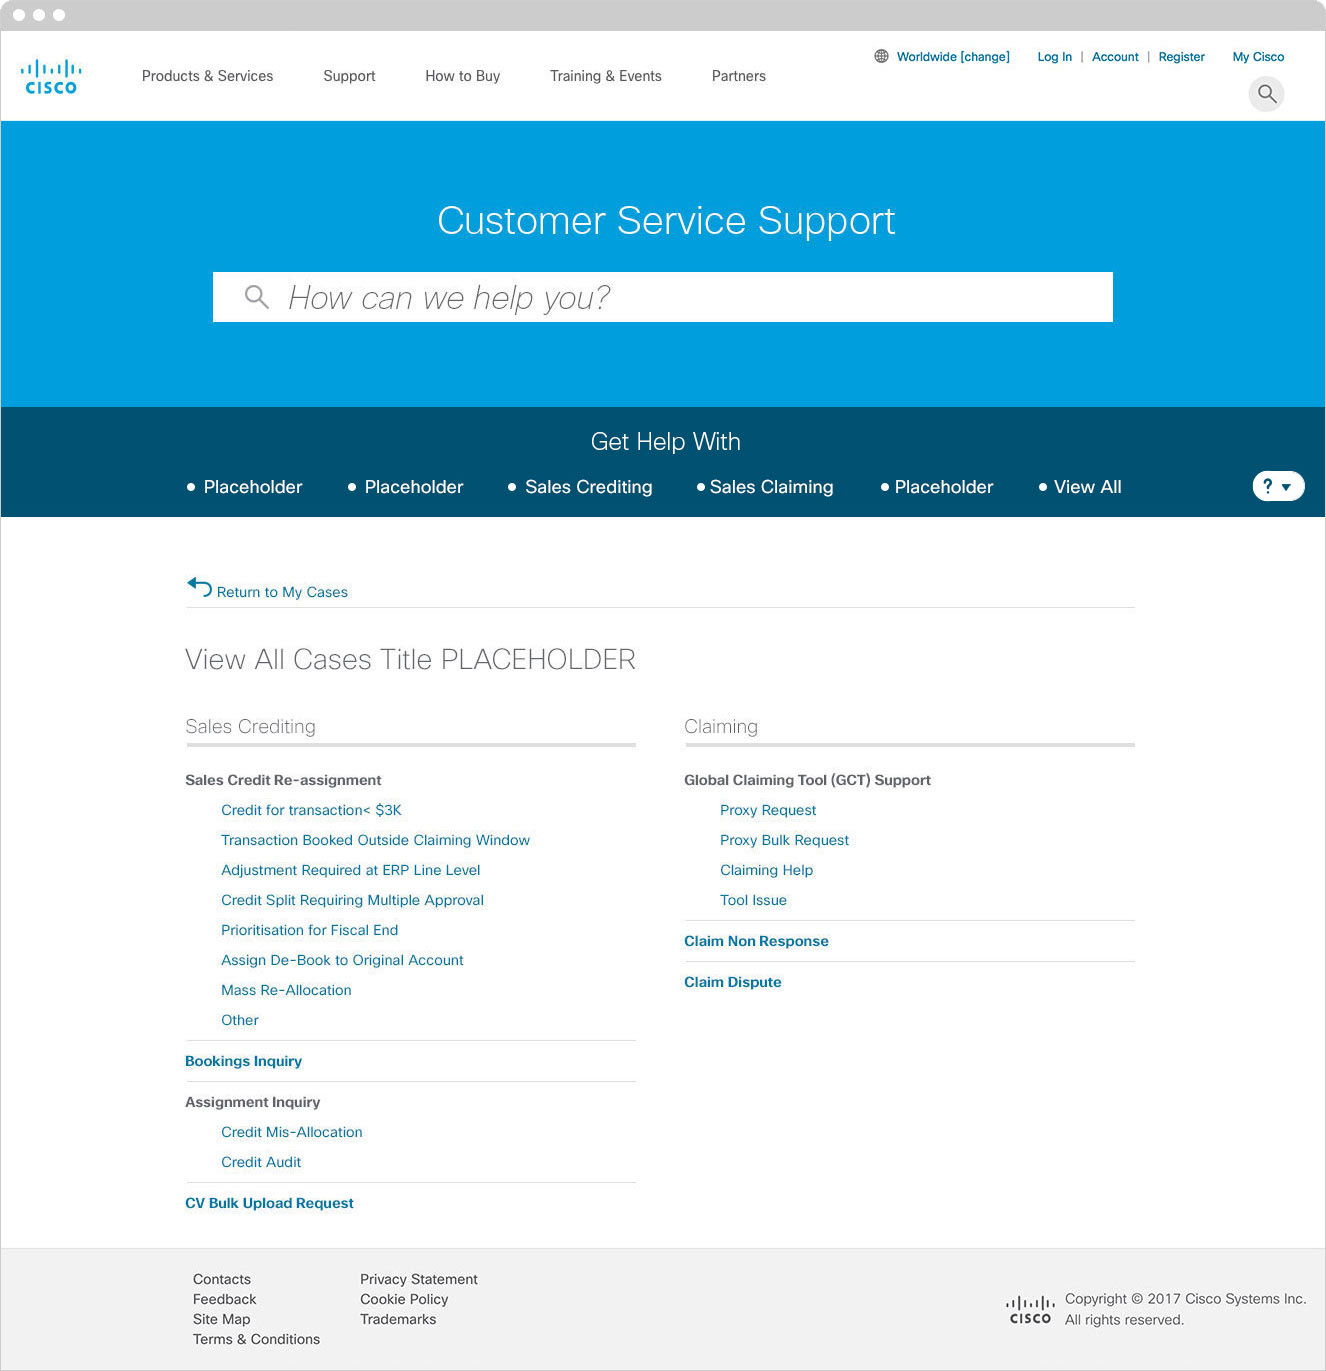
View All
If a user knows the case type they need help with they can click a case type from the menu. The "View All" button shows a list of all case types and sub types.
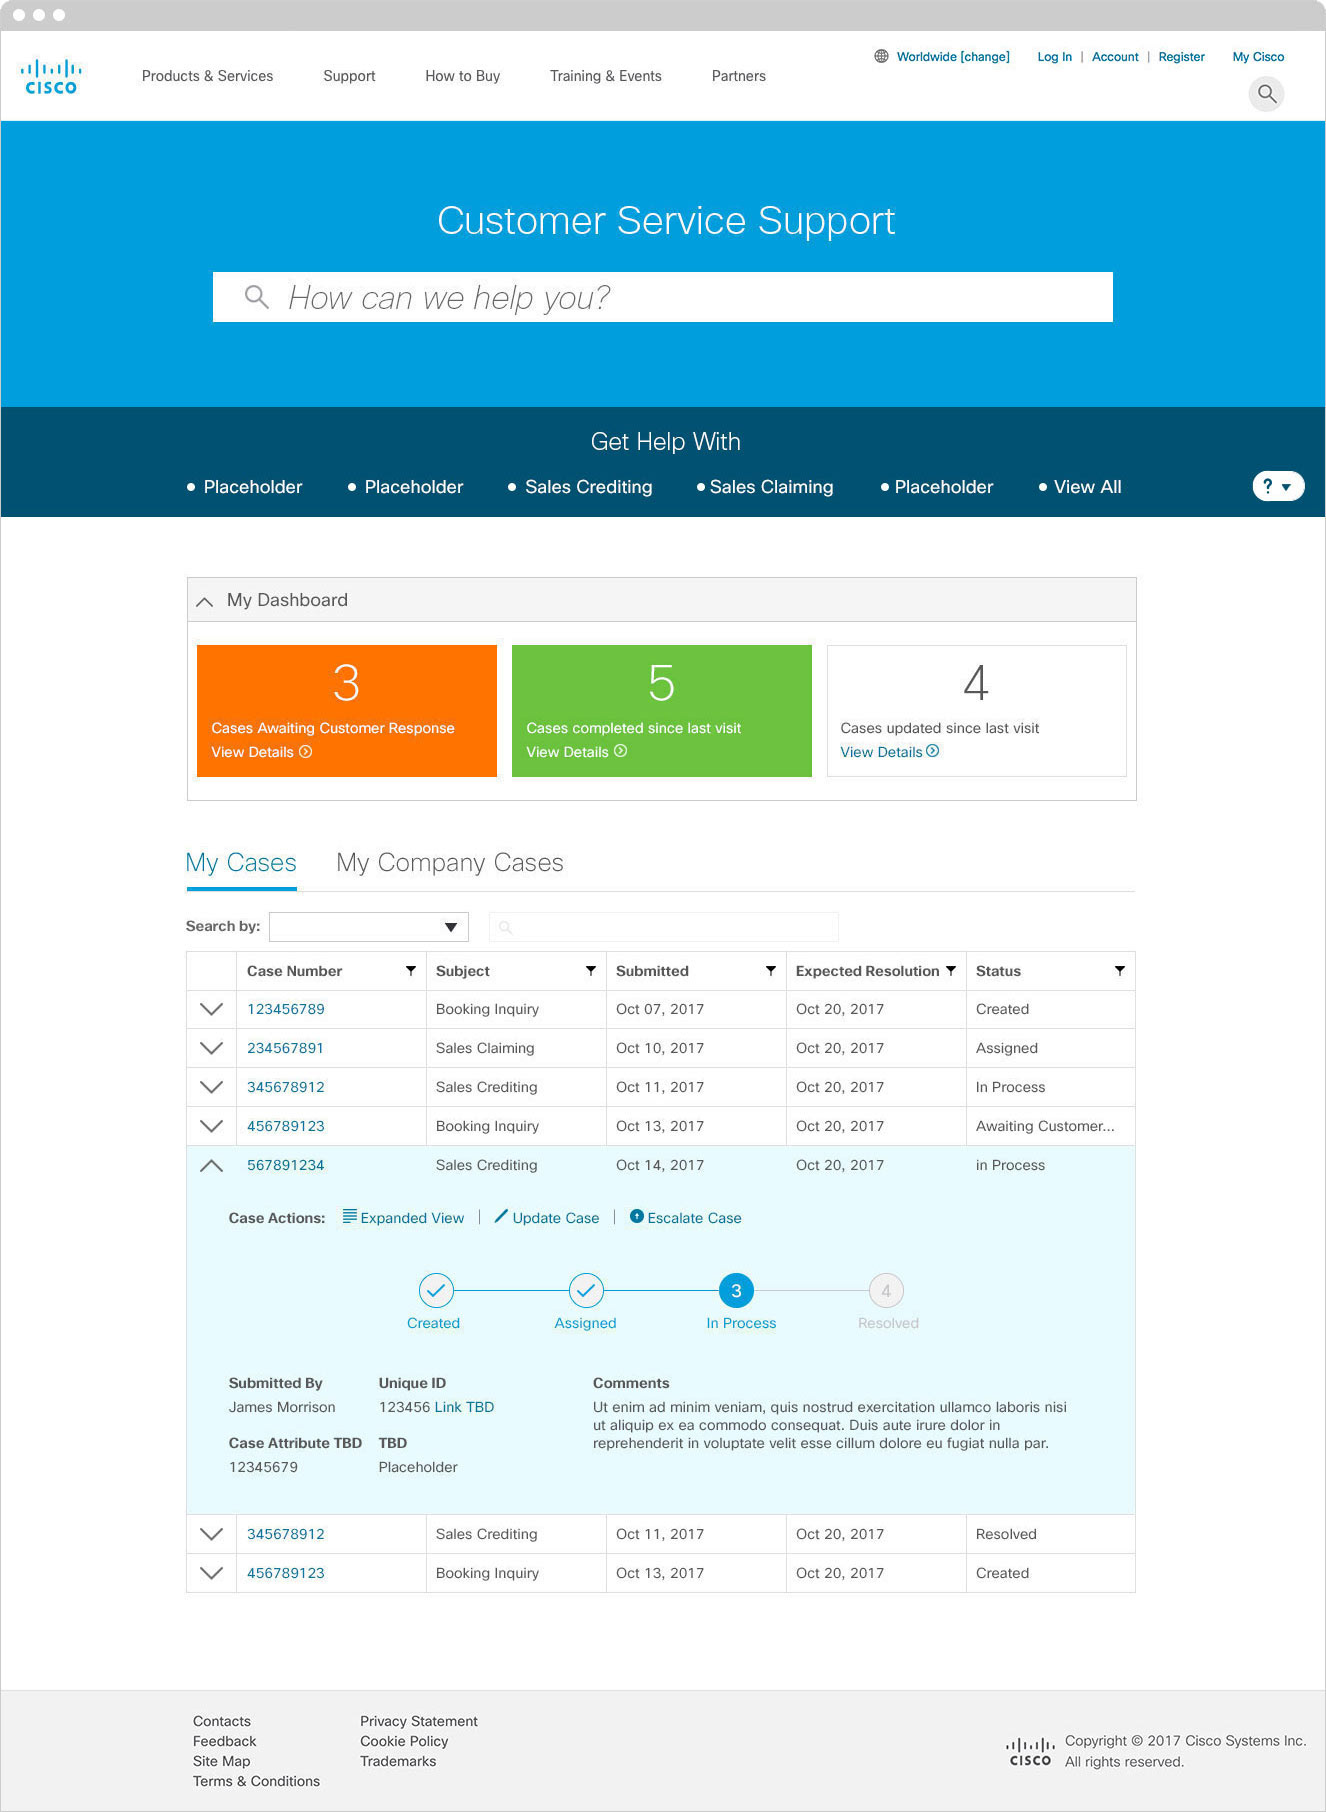
Quick View
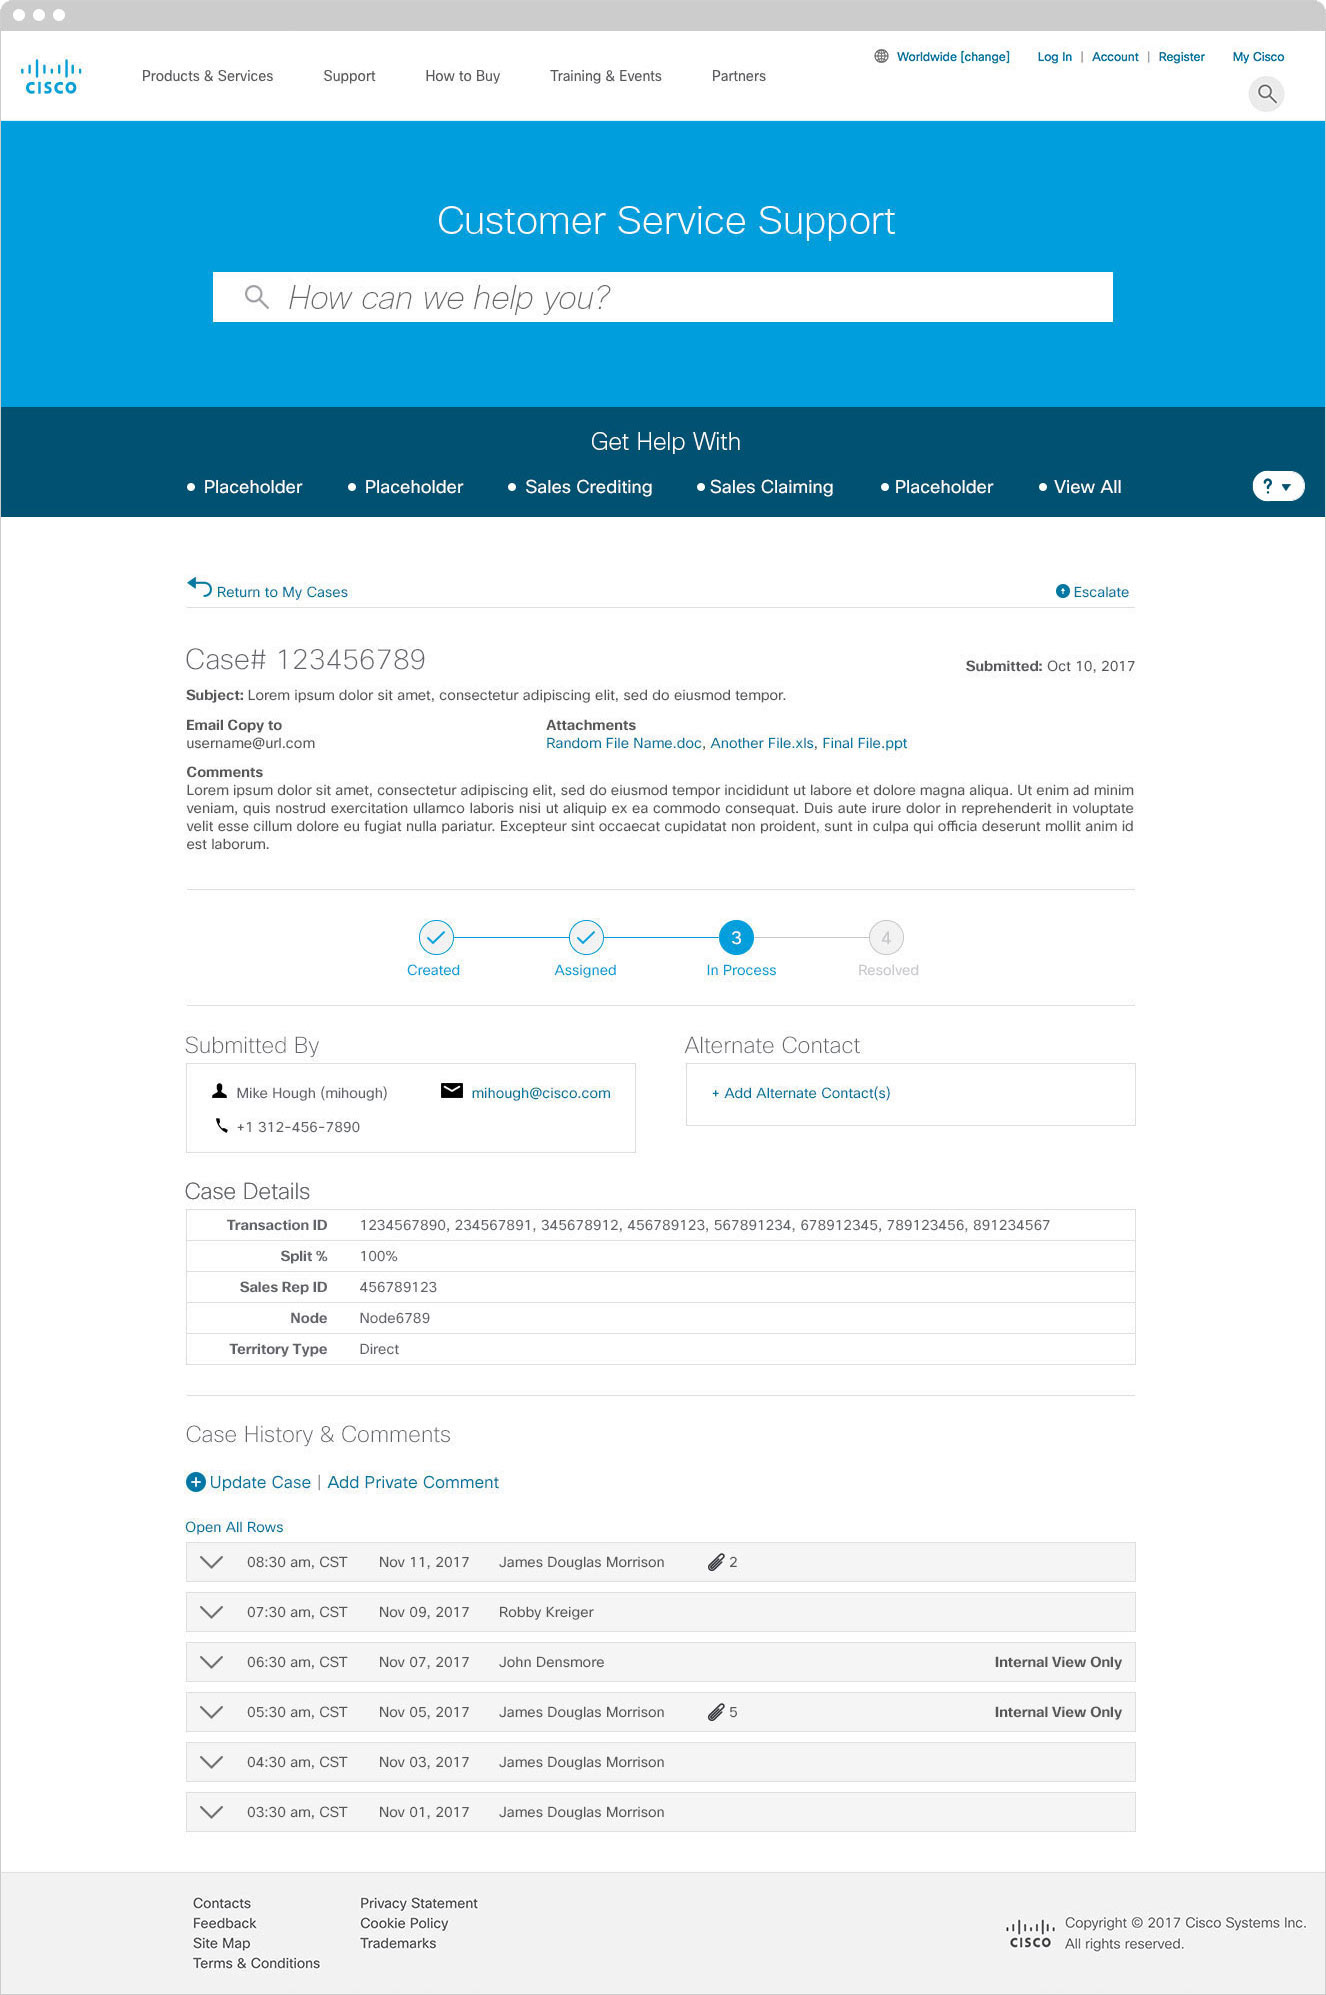
If a user has a live case they can expand the the table row to get a quick view of the case. This view supplies a few details, such as who made the case, the case creation date and where the case is in the process. A user can escalate or update a case from this view. The "Expanded View" takes the user to a detailed view of the case, a user can also click the case number in the row to get to the detailed view as well.
Case Details
This is the most detailed view of a case. A user can see the full history of a case. The user can also update, escalate or address a case that requires additional attention.